The Particle Editor Part 1:
An overview of the editor
If you have not figured it out from the name, the Particle Editor is a tool that can be used to create or edit particle .alo files.
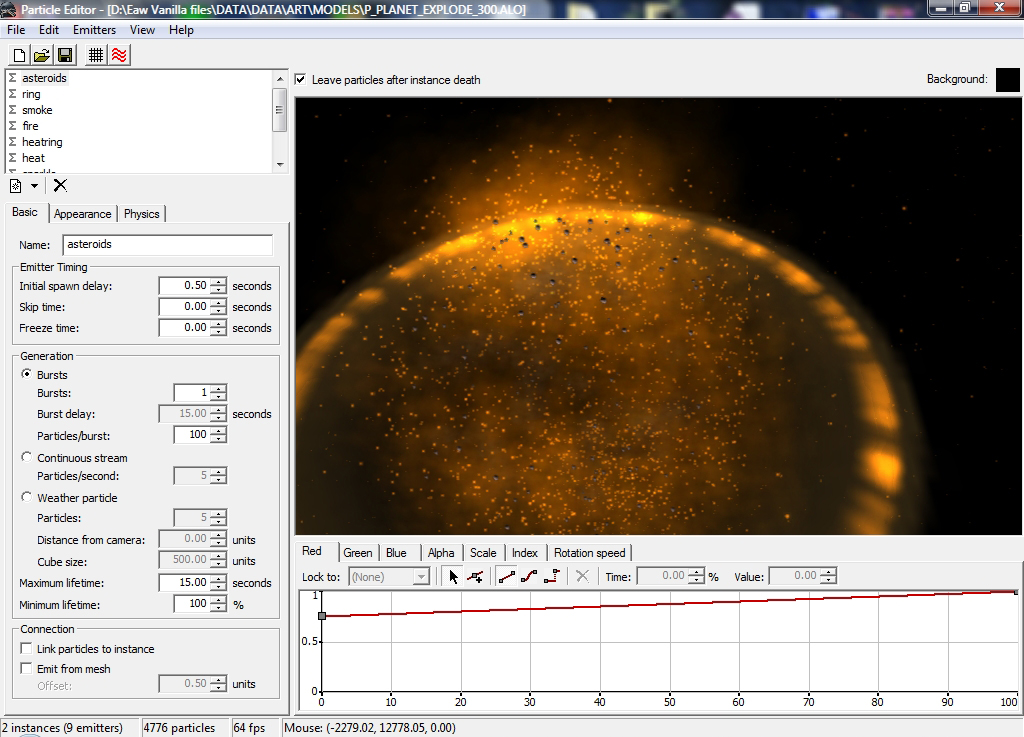
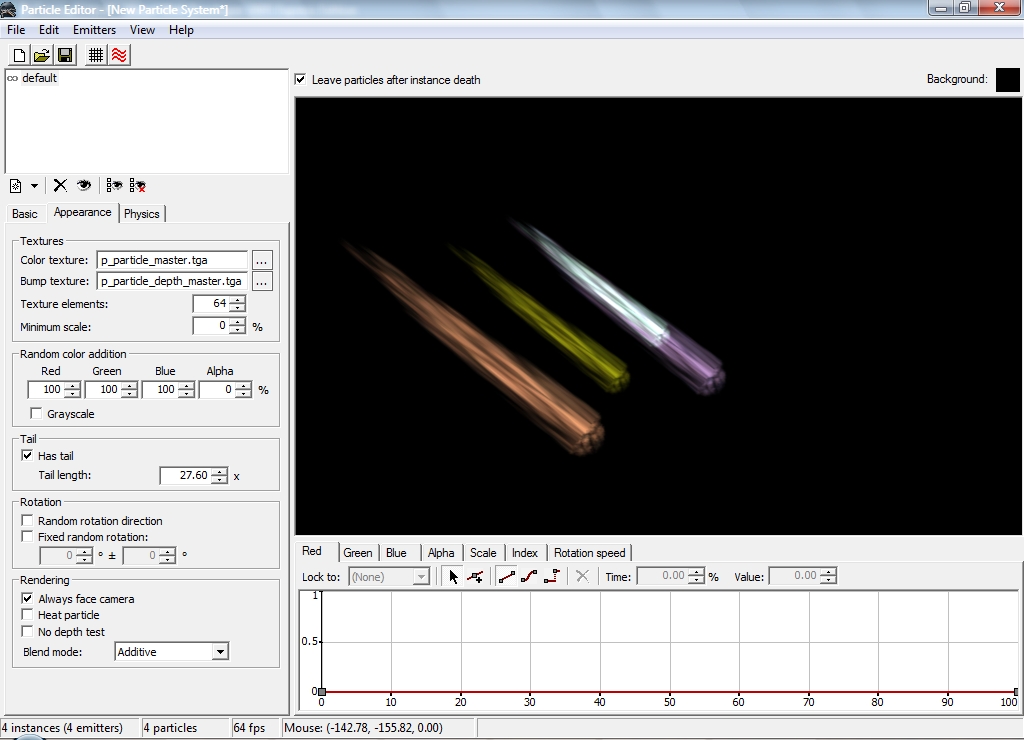
The UI, layout, and navigation
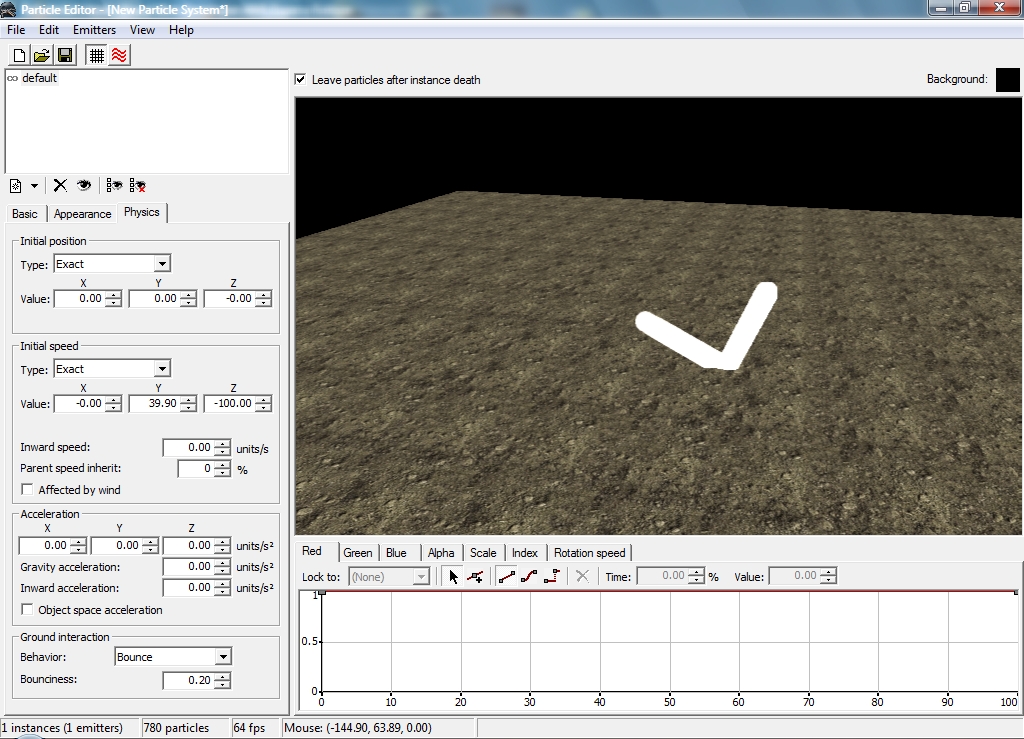
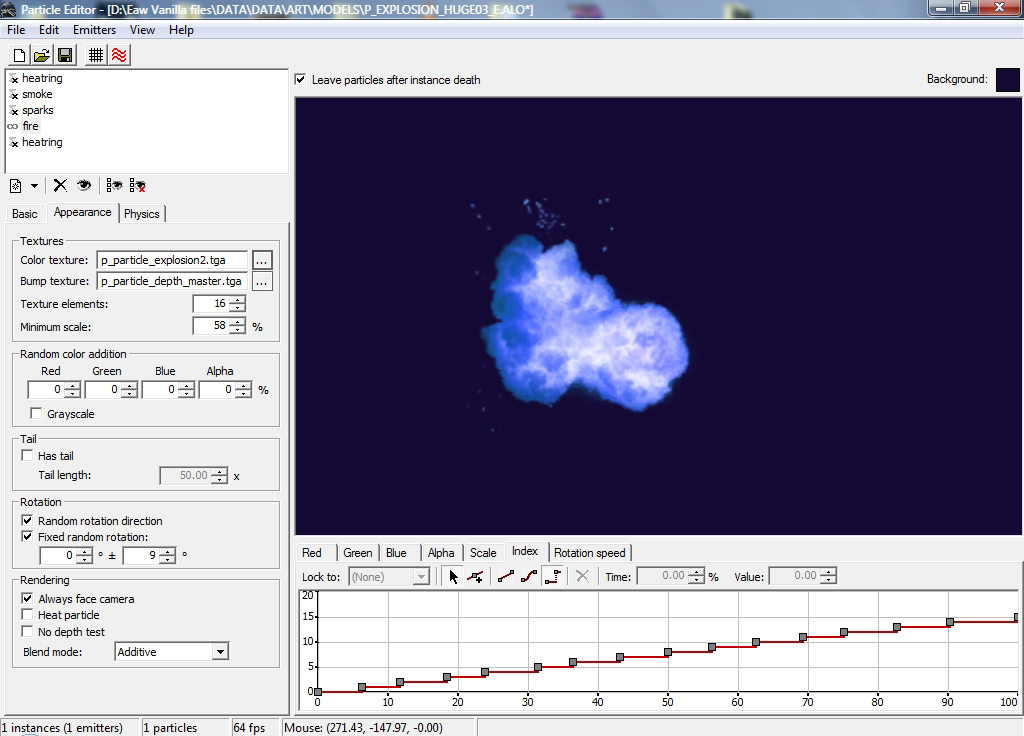
The particle editor is set up much like the Alo viewer. You have a viewport and a sidebar with tools and options, but unlike the ALO viewer you are given even more options with the lower bar.

Layout
- This is where emitters are kept. These are parts of your particle, and when combined and played back together create your final particle. You may also save and open.. ect from this location
- This is the left sidebar and its also where you will be doing most of your editing. This sidebar has 3 tabs: Basic, Appearance and Physics.
- This is your viewport for viewing your particles. Any changes made in the particle editor will update in real time.
- This is what I like to call the Trax (Don't ask why =D), or the track editor. This is used to change color, scale, rotation speed, and index.
Navigation
Navigating through the viewport is similar to navigating through the ALO viewer.
Click and drag the left mouse button to pan the camera left and right.
Click and drag the right mouse button to turn the camera.
Scrolling with the middle mouse button will zoom in and out. For people without a middle mouse button you can zoom in and out by holding the controll key and dragging with the left mouse button.
You can place emitters in the scene by pressing shift and clicking in the viewport. You may also change the altitude of the emitter by pressing shift and dragging with the left mouse button.
Area 1: Emitters
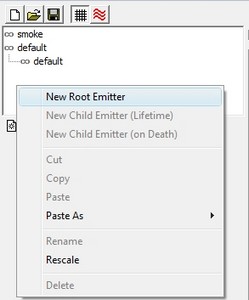
Before you can make any particles at all in your blank scene you must place emitters and name them. To add an emitter you may simply right click and click "new root emitter" To rename an emitter you can simply right click and rename. Simple eh?
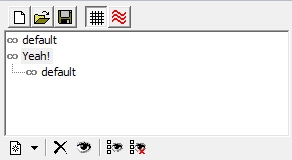
Ah yes, organization is key
To delete emitters you may right click and click on delete, or you may use the delete button below the emitter window. Also note that you may create emitters using the button to the left of the delete button. Name them something useful, this will make working with large particles easier.
Area 2: The side panel
We have arrived at the part of the editor where you will spend most of your time. There are three main sections to this side panel: Basic, Appearance, and Physics. Lets start with the basics =D
The "Basic" tab

Emitter timing
As I have said before this controls when this particular emitter will go off.
Initial spawn delay sets the time before this emitter starts from the second the entire particle system is spawned. Explosion first, smoke later? This is how you do it. Please note that this timing controls this emitter ONLY, as it should be.
Skip time tells the particle how much time to "skip ahead" at the start. This appears to be rather useless as you could simply "make" your particle not start without the need of 5 seconds of "preheat", but it will be usefull in the future.
Freeze time is the time before the emitter freezes and locks itself in its current state, still rendering the output from when it was frozen. Setting this to 5 seconds will cause a particle to freeze after 5 seconds.
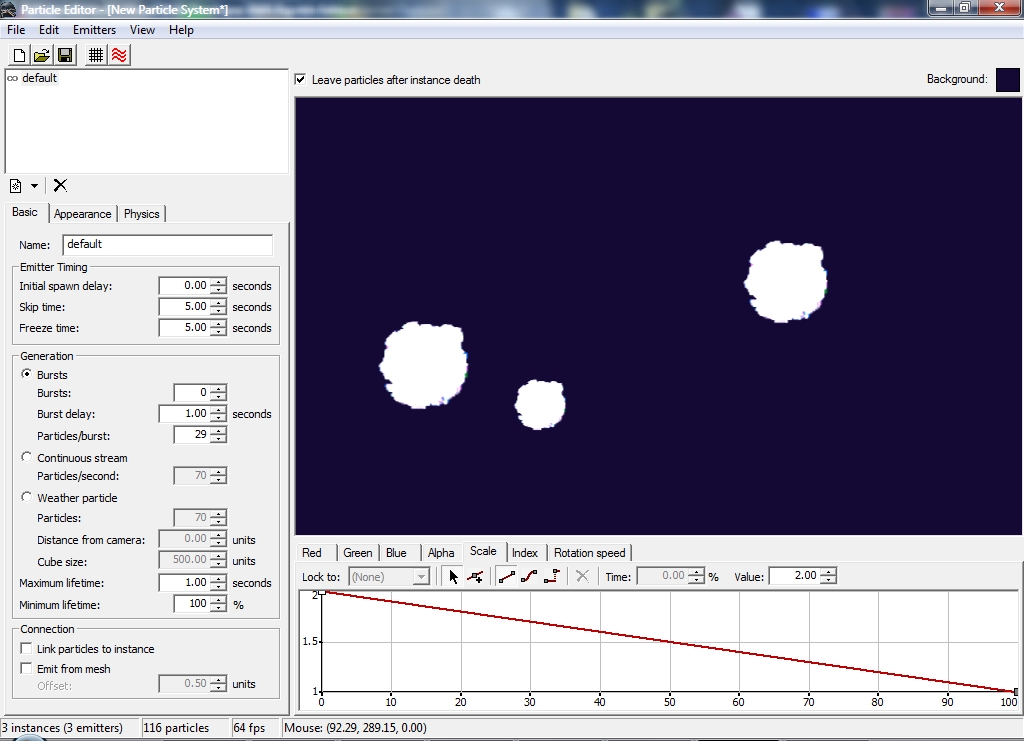
Generation
This controls how many particles come out, and at what rates.
Bursts: As its name implies, this makes particles come out in a predetermined amount of bursts, with certain particles per burst, with a delay per burst. Setting the number of bursts to zero will make the bursts infinite, as long as the emiter remains in the scene.
Continuous: Particles come out at a steady rate forever as long as the emitter exists. Simple and default.
Weather: Weather generation mode is used for creating particles that are used for... you guessed it.. weather. These particles will typically stay in front of the camera and this setting overrides many particle spawn options that will be discussed later.
Maximum and Minimum Lifetime: The maximum lifetime is the amount of time *in seconds* that a particle will remain in the system. The minimum lifetime is a percentage. This is the minimum percentage of the minimum time that a particle must live before dying. For example if you have a 2 second lifetime and a 50% minimum lifetime, ALL particles must live to at least 1 second, however all the particles after that may die anytime but not life anylonger than 2 seconds. It is completely random.
Connection
Link particles to instance
Emit from mesh: If this box is checked, any mesh that is linked to this alamo proxy will emit this particle from all of the verticies that compose the model.
The "appearance" tab
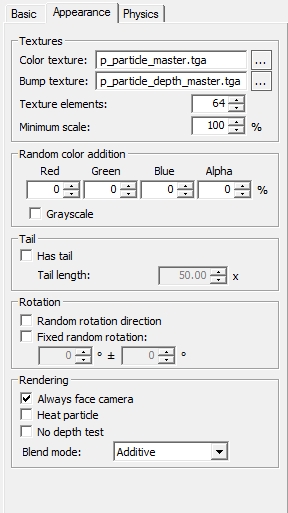
This tab allows you to define the shape and color of each individual particle.
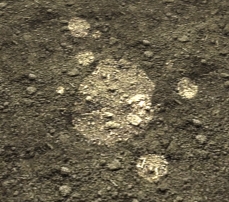
Texture
This section is where you define what texture your particle will use.
Color texture: You can specify the color texure here.
Bump texture: You can specify a bump texture here. Bump textures for particles are used mostly for calculating how particles are shaded.
Texture elements: Ever seen the P_particle_master.dds file? Notice how they put a whole bunch of particles on one DDS file? How could you possible map one of those small parts of the image to a particle? This is how. The texture elements just tells the program how many images are in the file you pointed to in the "color texture".
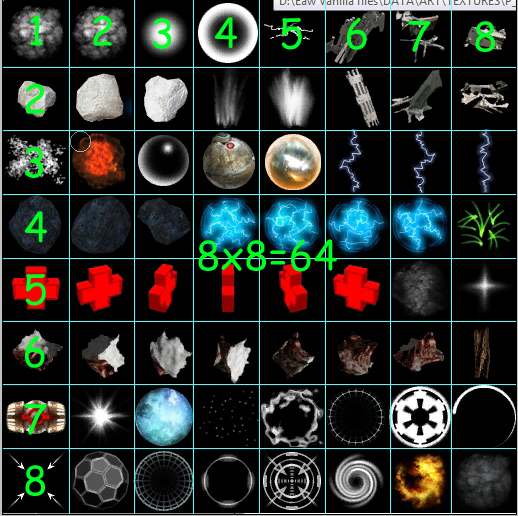
If you want to make your own master particle.dds file follow this scheme. However, this only works with perfect squares. 8x8=64 7x7=49.. and so on. All other numbers in this texture elements slot will be rounded down to the nearest number. This has nothing to do with image size, but it will be hard to put 64 particles on a 256x256 image file, and it would be inefficient to put 4 particles on a 1024x1024 image.

Minimum scale: If not set to 100% this will randomize between the minimum and 100% size of the texture image. Each individual particle will have its scale randomized upon generation.

Random color addition:
If the colors in the graph editor arent fully colorizing the particle *we will cover this later on* you may use this to randomly add color to a particle. You may controll this by color, or even have varying shades of grayscale with the grayscale box checked.

Tail
This creates a tail in the opposite direction of movement, that has a fixed length.
Rotation:
Random Roatation Direction: Will randomize the rotation direction with each new particle
Fixeed Random: Randomizes the rotation of the particle upon spawn, but then stops it from rotating.
Rendering:
Always face camera: This tells the particle to face the camera perfectly at all times. Never at an angle.
Heat particle: This makes this particle a heat particle.
No depth test: This stops the game engine from checking weather there is anything above it that may block this particle from view. This means that this particle will render if it exsits, irregardless if there is something blocking its view.
Blend mode
Blend mode defines how the particle will blend with other objects. Controls transparency and rendering of this particle in general.
Blending modes
None:

Just the plain texture rendered. No rendering effects at all.
Additive:

As its name implies, additive is a type of blending that will "add" to the colors below it. Black = no addition. Basically black = transparency.
Transparent:

Anything black will be transparent. Everything else will be rendered normally.
Depth Modes:
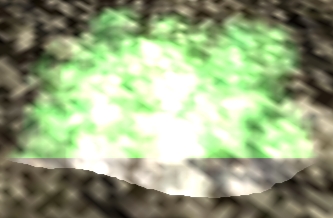
Depth modes are "clones" of the already mentioned blending modes, except for the fact that these attempt to make particles appear to have volume. It will make them
more "3d" ish if you will. Requires a depth map to work *placed as the bump texture*. Notice how the green and white particles' intersection points
with the ground are different. The green particle intersects with a line. The white particle with deptph additive intersects at a curve to give the illusion of volume.
Bumpmap:

Apart from showing some bump effects to particles, bump also causes particles to light up differently according to how you view at them with the camera,
ideally reflecting what one would see reflected off of the particle.
Decal bumpmap:
The "physics" tab
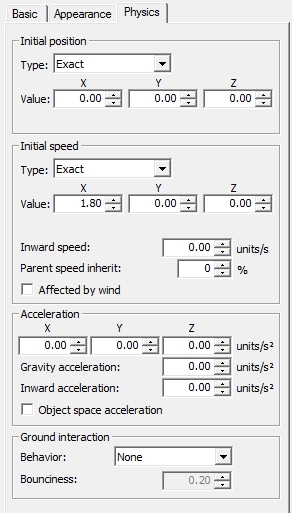
Initial Position
Type: This controls where particles are spawned.
Types
Exact: This means that all particles will be spawned from the same location... Every time. An exact point.
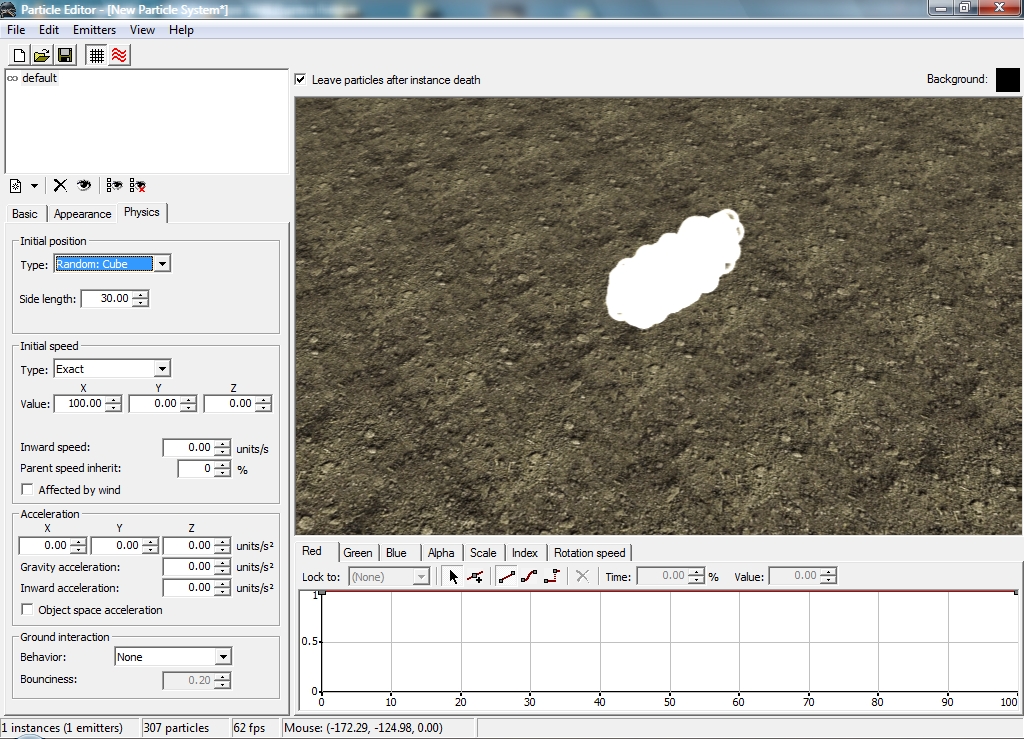
Box: Particles will spawn randomly within a box's boundries. The box's dimentions are defined with XYZ distances.

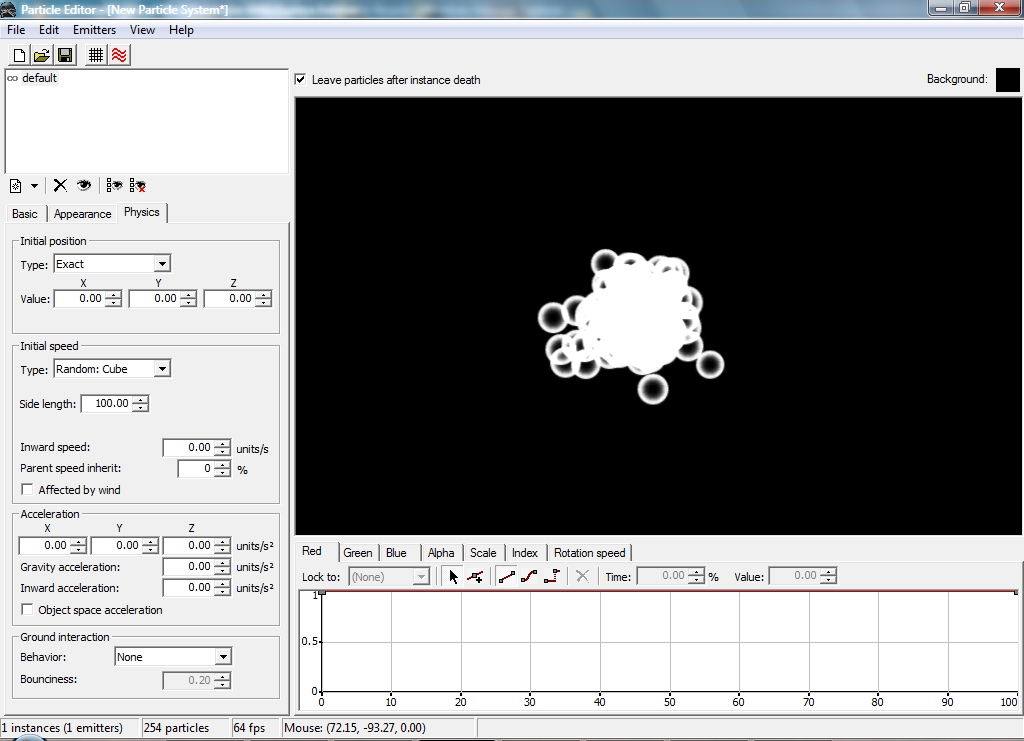
Cube: Similar to box, but this has only one parameter for side lenghts. *its a box c'mon guys! =D* Again generation within this box is random
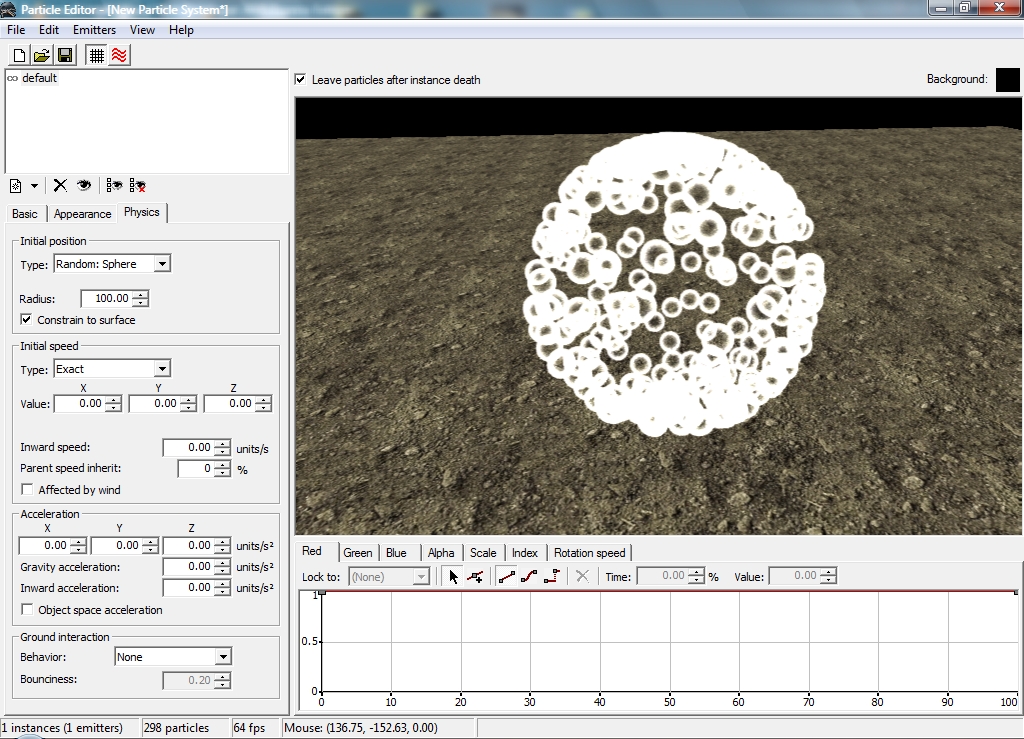
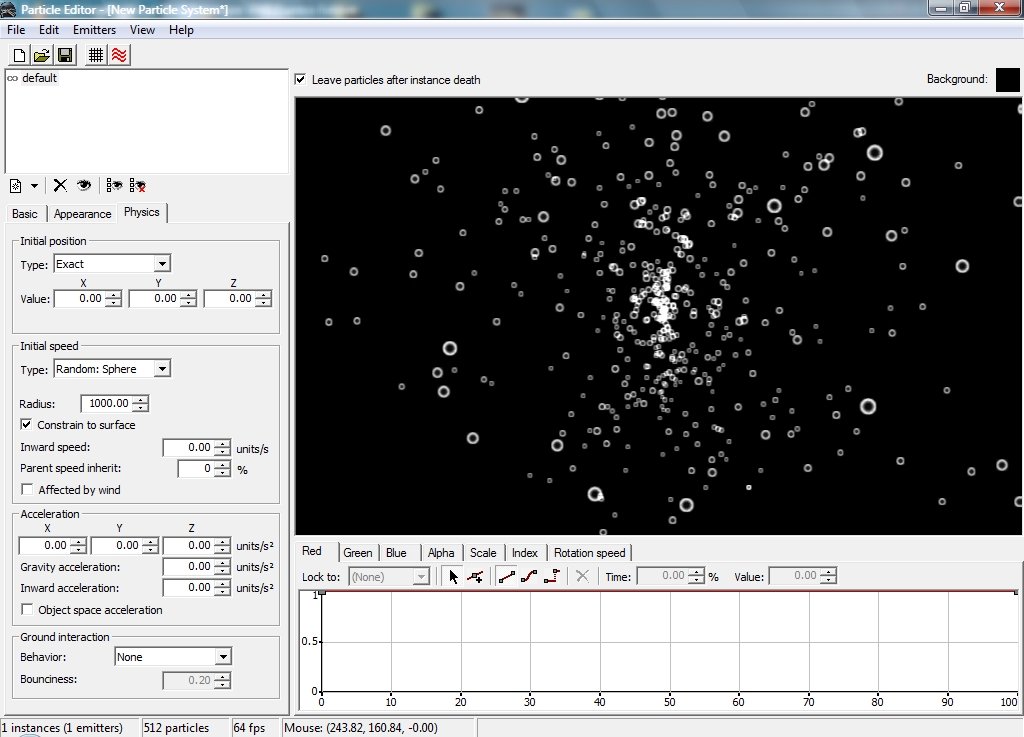
Sphere
This uses a spherical shape as boundries. Constraining to surface means that particles will ownly spawn on the surface of the sphere and not inside of the circle itself
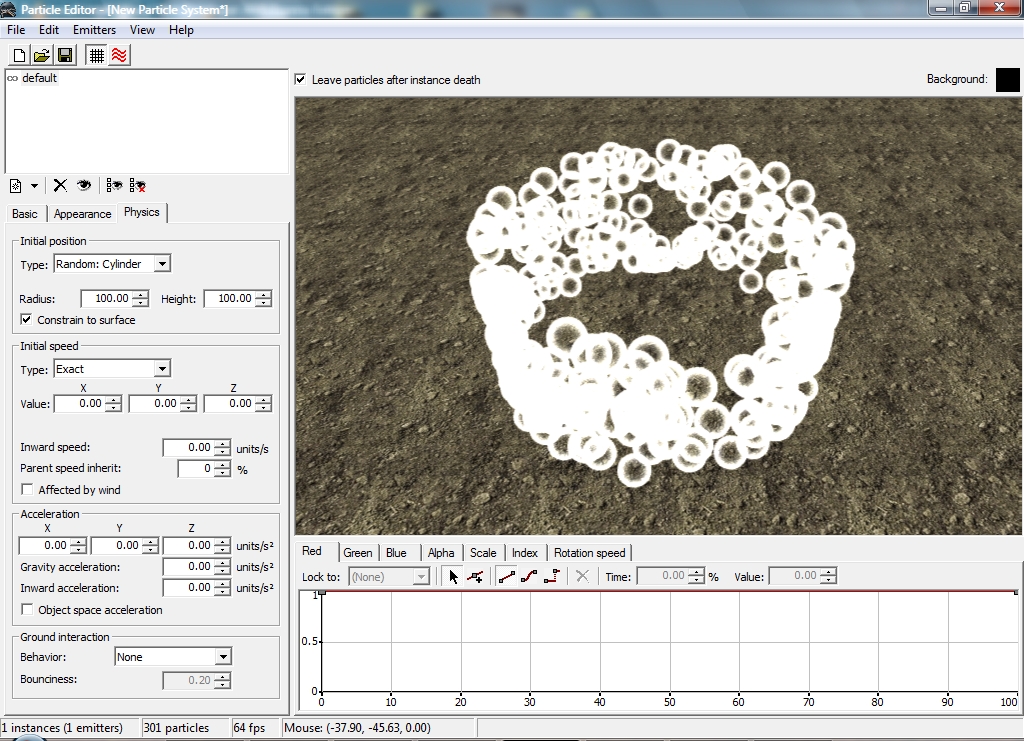
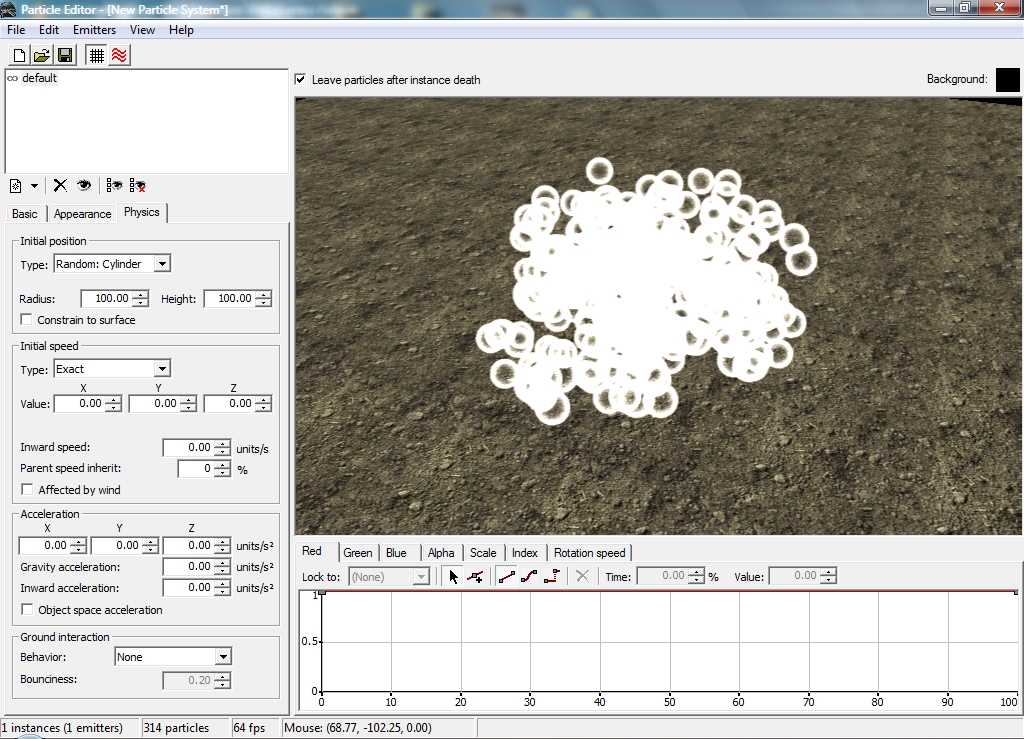
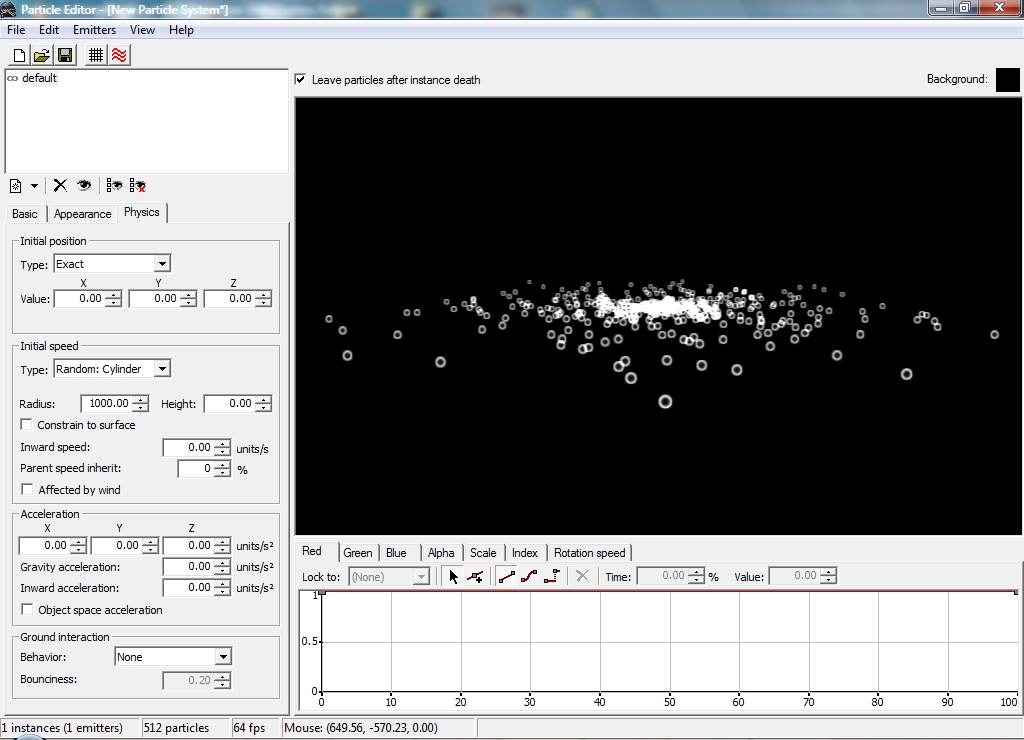
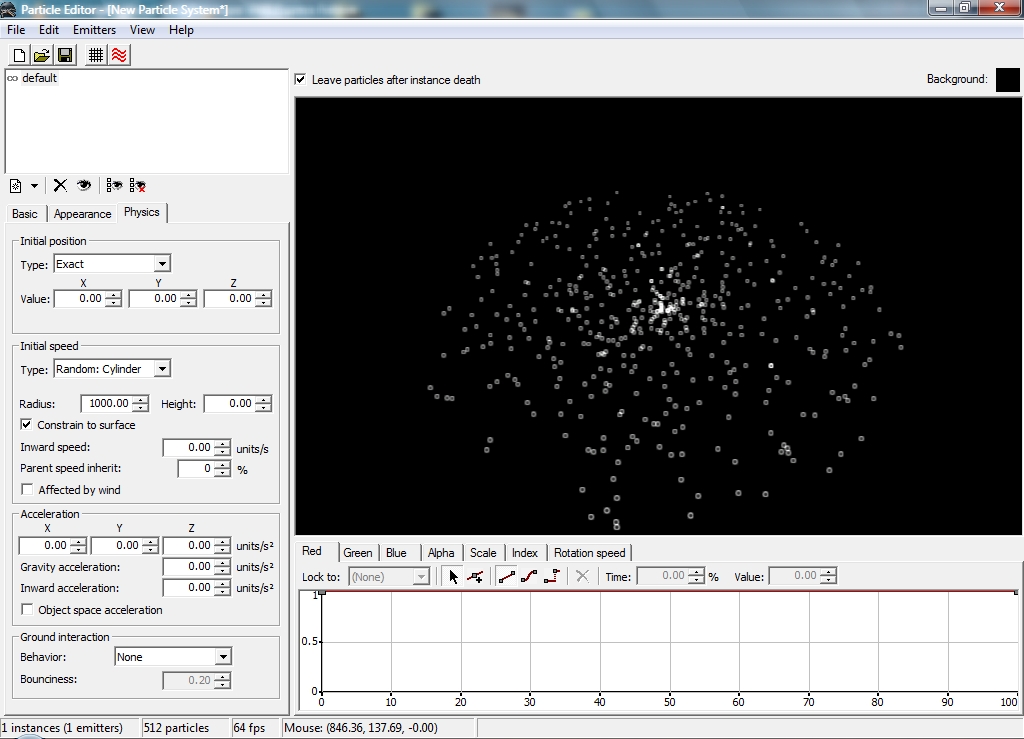
Cylinder
Same as sphere, but with a cylinder
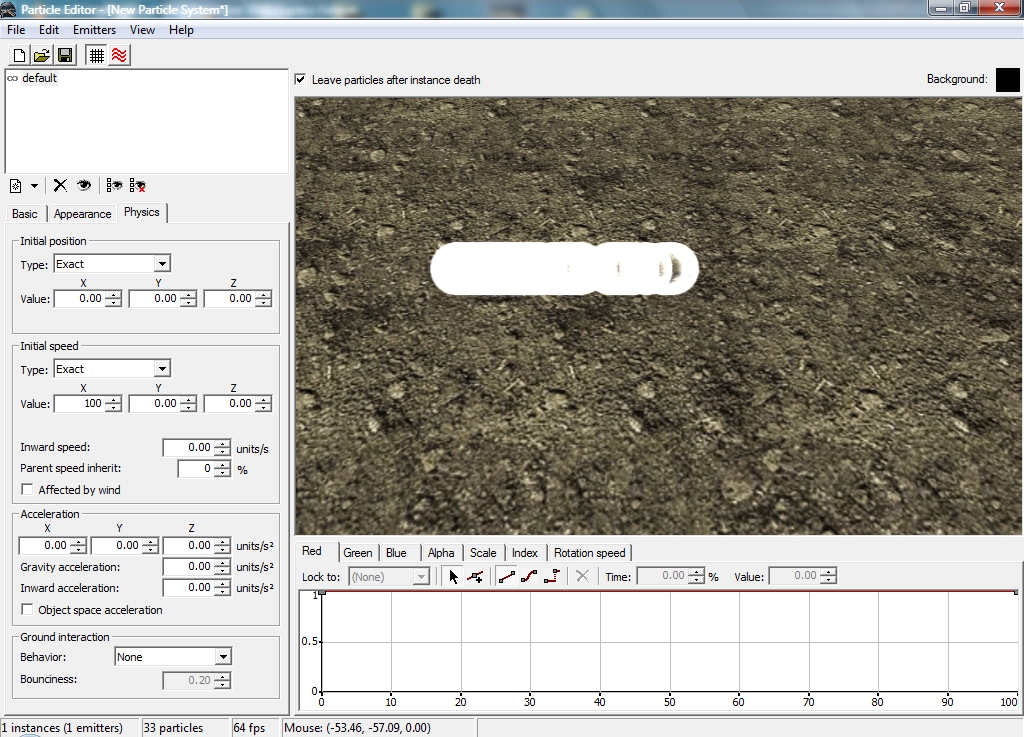
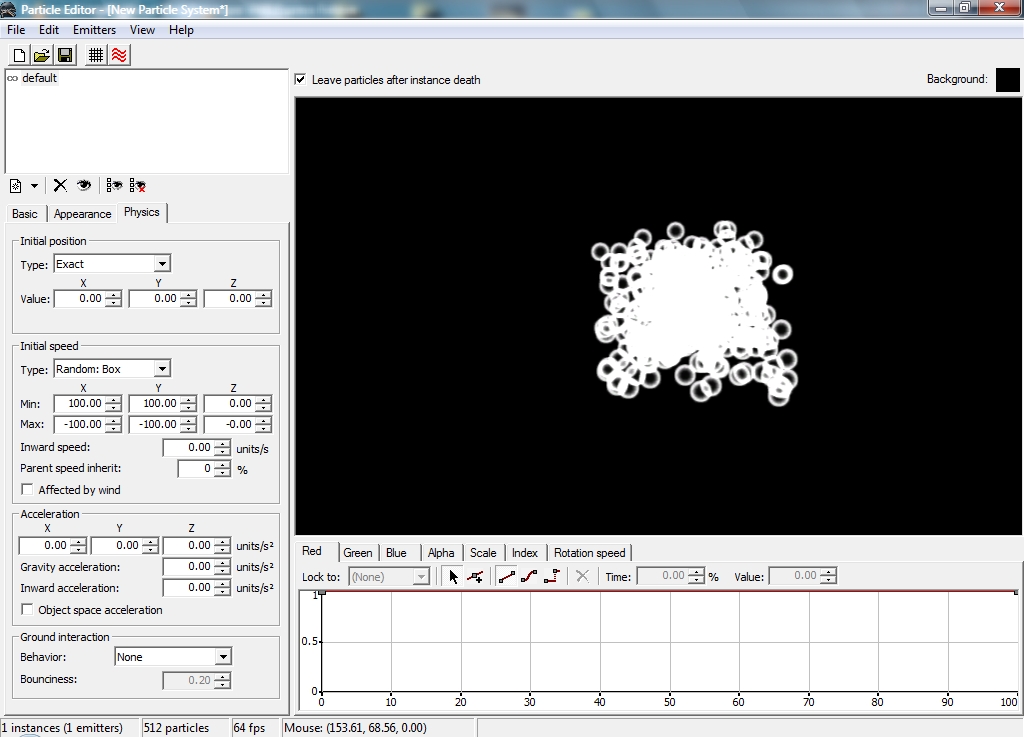
Initial speed
Type: These control the initial speed of particles after they are spawned.
Types: All of these work nearly the same way that spawn locations work, except they speed outwards in these general directions
Exact:

Box:
Cube:
Sphere
Cylinder
Inward speed:
Parent speed inherit: This specifies how much of the parents speed to inherit. If the proxy is moving fast *due to the fact that it is some fast moving missile or something* having this value at 100% would mean that the entire scene of the emitter would be moving in parralell with the proxys motion. To visualize this notice how the particles move with the A-wings attract fighters ability.
Affected by wind: pretty much self explanitory.
Acceleration
Ah yes acceleration. First of all before you ask *I know at least a few will ask* The difference between speed and acceleration is speed is a constant, *at least here* and acceleration is change in speed per second. Constantly getting faster and faster. Adjust with XYZ velocities

Gravity Acceleration: Acceleration caused by gravity. If you want this to be affected by gravity in game, use this as there may be times when gravity might not be -z.
Inward Acceleration: Acceleration towards the center of the particle system when using the box,cube,cylinder, or sphere.
Object Space Acceleration: All acceleration in XYZ will use the local axes of the proxy, and not the scenes XYZ directions.
Ground interaction
This tells the particle what to do when it hits the ground.
Behaviors:
None: nothing happens.. it keeps going
Dissapear: Particle dissapears upon collision
Bounce: Particle bounces upon collision. You may set bounciness with the slider below the Behaviors drop down menu.
Stick: particle sticks to ground upon collision
Area 4: The Graph editor, track editor, or simply "trax"
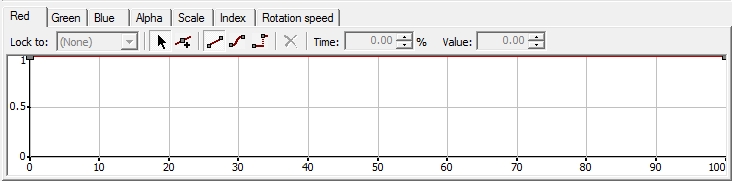
The graph editor is where time sensitive options are held. If you have ever used any animation programs this will be fairly familiar to you.
Using the track editor
Using the track editor is quite simple. The track editor lets you change properties about the particles that may change as its lifetime goes on. Want it to start out large and then go small?, or how about a gradual fade to invisibility? You can do that here by moving and adding keys.
Graph editor tools and options
- Lock to: This locks this particular graph to another. Essentially makes this an instance of another graph, if you change the other graph this graph will follow. Graphs locked to another graph can not be directly edited until they are unlocked.
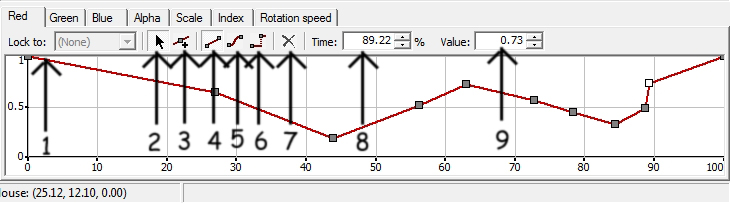
- Selection tool: Select and move keys with this tool. You may also click and drag with this tool to select multiple keys.
- Add Keys tool: This tool will add keys to the graph.
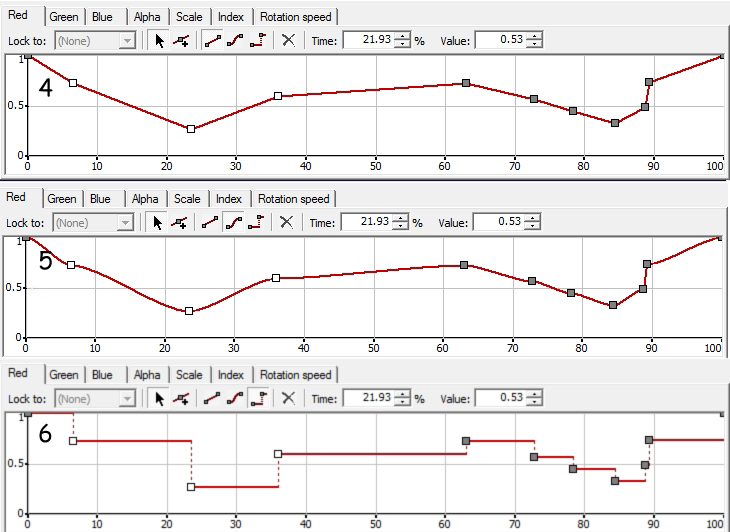
- Linear Interpolation: This setting makes all the "connections" between all the points a line, or linear if you will. This causes constant gradients of change.
- Smooth Interpolation: This makes all the "connections" between points smooth.
- Step Interpolation: Like its name implies this causes the "connections" between points to become harsh and stepped.
For quick and precise changes in settings.
The different interpolation settings. - Delete keys: If you have one or more keys selected, you can use this key to delete them. Alternatively you may use the "delete" key on your keyboard to delete keys. *wow that was a great sentence*
- Time:If you have one or more keys selected you can use this button to change the keys' X time component. 0% would be at the particles' lifetime, 100% would be at death. Selecting many keys displays the average, and allows you to move keys together.
- Value: The value of the key or the y component. For example, if a certain key was 1.0 red at a certain key the particle would have 100% red at that specific time. If the key has a value of .5 for red it will only show up as 50% of the normal value for red. Not all values are from 0-1. Some values may be scaled up indefinately as far as I know. Selecting many keys displays the average, and allows you to move them up and down toegether.
The graphs
Red, Green, Blue, Alpha
These are graphs used to change the different amounts of color a particle has. This works best with Grayscale images, although full color can also be used. The alpha graph controls the transparency. -note: The Alpha setting may do nothing in certain blend modes (such as Additive)
Scale
It scales the size of the particles. It does its job well.
Index
Remember texture elements from earlier in this tutorial? That number corresponded to the number of images in the entire DDS file. Thats all fine and well, but if you have no way of selecting between those what good does it do? Thats what the index does. The index allows you to "animate" or simply call a certain teture slot into play. Setting the index to 2 will show up the second image in the file *or at least those coordinates according to the texture elements number*.

Rotation speed
Controls rotation speed of particles. Pretty straight forward.