This one is going to be really long for me to write, so lets start.
We will start with the normal shaders. Presumably to be used most often with space units.
Note #1: all FXH files are included by the FX files. So they aren't for use by themselves.
Note #2: the "use" part of the explanation will tell you some values known to produce good results. Probably because I looked for a unit that used it, and then looked up its values. So to input those values just do as is done in this screeny.
The numbers will be given like so: 0, 0, 0, 0. So it goes RGBA: Red Green Blue Alpha
Ok now we start with the normal shaders
2x Diffuse + Specular lighting with alpha blending.
Batching - FOW is done per-pixel so we can batch meshes using this shader together.
Not sure yet. I will update this once I find a unit that uses it.
2xDiffuse+Spec lighting.
Spec is modulated by alpha channel of the texture (gloss)
Batching - FOW is done per-pixel so we can batch meshes using this shader together
Same as above, except with gloss. Will update later.
This shader is responsible for drawing the circles you see around units when they're selected. You may notice the circles don't overlap. That is, their outline forms a single "blob" around the selected units.Shader for selection blobs. Renders in two passes, first pass uses alpha test and writes into the z-buffer but not the color buffer.
The second pass uses alpha blending and ZFunc=LESS.
This results in the second pass being "masked" out of anywhere that was rendered in the first pass.
2xDiffuse+Spec lighting with Alpha blending
Alpha of the vertex is scaled by dot(N,V) so that edge on polygons fade out
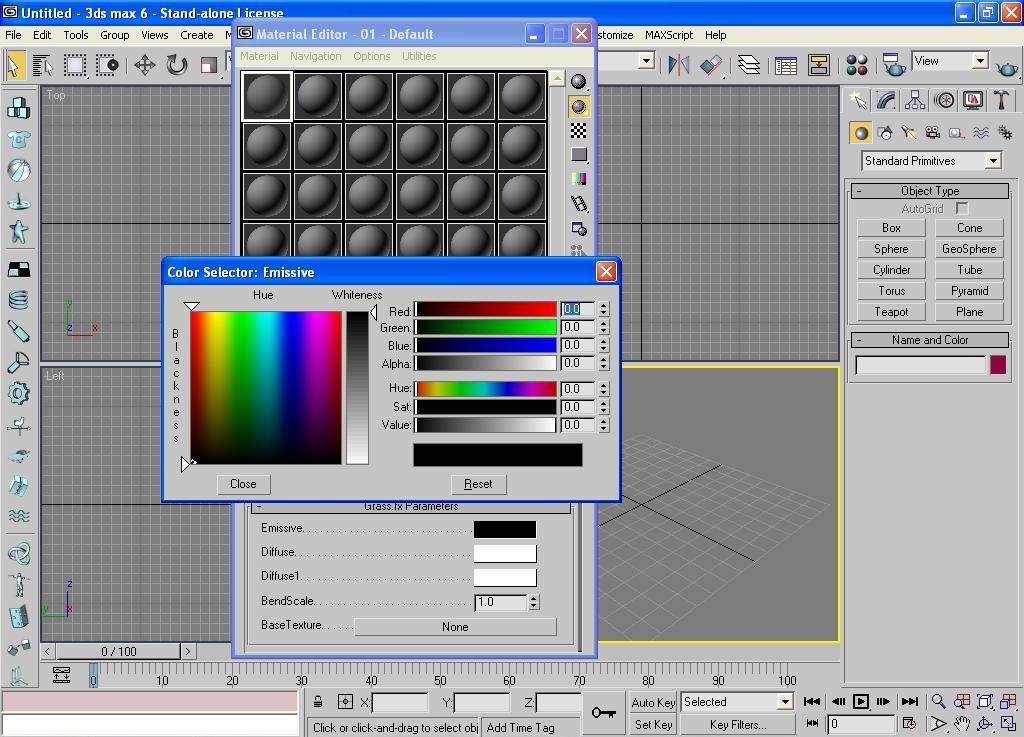
It makes the edges of the grass fade out giving them a slight transparent look at the edges which makes it look more grassy. This also also controls the grass swaying in the wind. So if you don't have this shader on the grass, it wont look or act like it. When used in max use these values.
| Emmisive: | 0,0,0,0 |
| Diffuse0: | 1,1,1,1 |
| Diffuse1: | 1,1,1,1 |
| Bend scale: | (this value is personal preference and will not give any adverse effects to the look of the grass. But as an example, Swamp grass has 0.050) |
| Base texture: | The texture for the grass. |
Simple additive shader
Simple additive shader. Used in muzzle flashes for unit attacks.
| Base Texture | W_laser_smal.tga. It's probably a DDS but the engine takes both as the same; you could substitute your own. But since this is such a widely used muzzle flash, I decided to say what it is |
| UV Scroll Rate | 0,0 |
| Color | 1,1,1,1 |
FX file for Mesh additive shader that supports texture offsetting.
This shader is separate from MeshAdditive because it has to support uv-offsetting even on the min-spec (which means we are using a scripted texture transform when running on fixed function; this is not the most efficient thing to do so I separated this shader from the general "additive" shader)
Initial motivation for this shader was the capture point icons that "fill" over time as they convert to a given faction. These are "rare" objects so the initial implementation just uses FX scripting to generate the texture transform for the fixed function pipe.
Used in capture points when you want a material to move a certain way, but similar to the original MeshAdditive.fx
Once I find the model for the cap point I will update its use here.
Simple additive shader
This one seems to serve the same purpose as the main mesh additive but with no color option. Not sure why there is more than one. I will do some more research on their specific use later.
Still unknown in its use.
2xDiffuse+Spec lighting with Alpha blending
Alpha layer blending? I don't know. It seems like a basic shader to me.
I found out that it is used often for Hardpoint blast meshes. So I will investigate later.
2x Diffuse+Spec lighting with alpha blending.
Alpha Blending is taken from the alpha channel of the base texture texture
Spec is modulated by the red channel of the gloss texture (assumed greyscale)
Basically same as MeshAlpha.fx, alpha layer of main texture controls. Blending, but with gloss. The gloss is controlled by a gloss texture and specular is controlled by the gloss' red channel. Which they say should be grayscale.
2xDiffuse+Spec lighting with Alpha blending and scrolling
Same as above, with scrolling.
2x Diffuse+Spec lighting, colorization.
First directional light does dot3 diffuse bump mapping.
Colorization mask is in the alpha channel of the base texture.
Spec is modulated by alpha channel of the normal map (gloss)
Basically your basic space shader, with a bump map. Great for capital ships. Used in the ISD. I extremely suggest that the first time using this shader that after you export your first copy of your Skinbump.dds file, or whatever the filename your bump-map may be. You re-open it. It should now have an alpha layer. Then go to the alpha layer and fill it with black. Otherwise any white areas will glow and make it over-shiny. Later on you can come back and utilize this shininess to your heart's desire. Another thing: the alpha layer on the main texture controls colorization. So if you want your model to glow keep it gray to white. All white causes over colorization. So I just keep that all black since for now I don't want that glow.
| Emissive | 0,0,0,0. You don't really want it to glow |
| Diffuse | 1,1,1,0. You want your texture to show up |
| Specular | 1,1,1,0. Reflective ness |
| Shininess | 32 |
| Colorization | 1,1,1,0 |
| UV offset | 0,0 |
| Base texture | Base texture of the model |
| Normal map | Bump texture of the model |
2x Diffuse + Cube Reflection, colorization.
First directional light does dot3 diffuse bump mapping.
Spec reflection from a cube-map sample is modulated by spec color and alpha channel of the bump map(gloss)
Colorization mask is in the alpha channel of the base texture (as always!).
It has reflection from the alpha layer of the bump map (should be specular anyway). I think its just a different form of reflection. Maybe more mirror like.
Solid color alpha blend shader. Initial motivation is to have a minimal shader to apply to collision meshes.
Apply this shader to the collision mesh of the file. So drag & drop, and export (make sure you hide the collision box in the Alamo tools but export the geometry. Not in Max, because if you hide it in Max it will not even export it's geometry).
2x Diffuse+Spec lighting
Spec is modulated by alpha channel of the texture (gloss)
Extremely basic shader with no bump map. Used in original tutorial if I do remember.
Gloss in alpha layer again.
2x Diffuse+Spec lighting, colorization.
Spec is modulated by alpha channel of the texture (gloss)
Colorization mask is in the rgb channel (assumed greyscale) of the colorize texture.
Same as above but with colorization.
Gloss is controlled by the, oh my, the gloss map!
This shader is for meshes which are to generate heat distortions. It just has to alpha blend its bump texture into the full-screen distortion texture.
This is used to render heat distortion effects. I didn't find it in the T2B model, which has it, so I guess I have to figure it out later.
Shadow Volume shader, extrudes the mesh in the direction of the primary light. Requires preprocessing in the tool pipeline to prepare the geometry for extrusion (split verts, add degenerate quads for each edge)
Apply it to the shadow mesh of the unit. The shadow mesh is similar to the collision mesh except that it should be more detailed since it generates the shadow of the unit.
What they mean by 'preparing' the geometry is this: every edge in the mesh should become a quad, vertices should becomes triangles and no vertices may be shared by two faces.
I'm not sure if 3dsmax has a tool for this.
Shield shader
Apply to the shield mesh of the model. Again it seems to be just another "collision mesh" styled mesh; only surrounding the areas that need it (almost the entire model).
Opaque solid color shader. One use is for color-keyed backgrounds for cinematics.
As its name and description say, it's just a solid color.
Simple additive shader
The Nebula.fx file is just a changed mesh additive shader used to render nebulas. Just drag and drop to a nebula model. With a nebula texture.
Planet shader,
BASE TEXTURE - planet surface color with specular mask in the alpha channel
BUMP TEXTURE - normals with city lights in the alpha channel
CLOUD TEXTURE - alpha blended with the base texture, animates around the planet at the specified rate
In addition, the base map is fogged towards an atmosphere color the more the normal points away from the view direction.
Base texture with shininess in the alpha map.
Bump map has... bumpiness (for landmasses and water masses), with lights in the alpha layer (lights from cities, only visible when the planet rotates away from light)
Cloud texture. Seems to be an alpha layer that blends down towards the ground, giving them transparency. For clouds obviously.
Now for models with animations.
If there is going to be any animation at all, the mesh must use a RSkin shader. This shader makes the mesh animate as specified in Max. Most of the RSkin shaders are just modified versions of the main mesh shaders, but suited for animations, so just look above for their meanings. Mostly used for ground units since they use the most animations, but space can use them as well (e.g., X-Wings).
Sky Dome shader,
BASE TEXTURE - Opaque texture, background image
CLOUD TEXTURE - Alpha blended with the base texture, animates at the specified rate
In addition, the base map is fogged towards an atmosphere color the more the normal points away from the view direction.
Used for sky domes. Never made one, but if you want to tell me maybe I can relay some more info later on.
I would assume to just put it on a sky done and export.
Tree shader, incorporates wind-swaying,
Was trying specular bump mapping but it didn't seem worth it so its commented out..
Yep, for trees swaying
I guess later on we can uncomment the bump-map option and see how it looks after that.
I would agree though: not worth it.